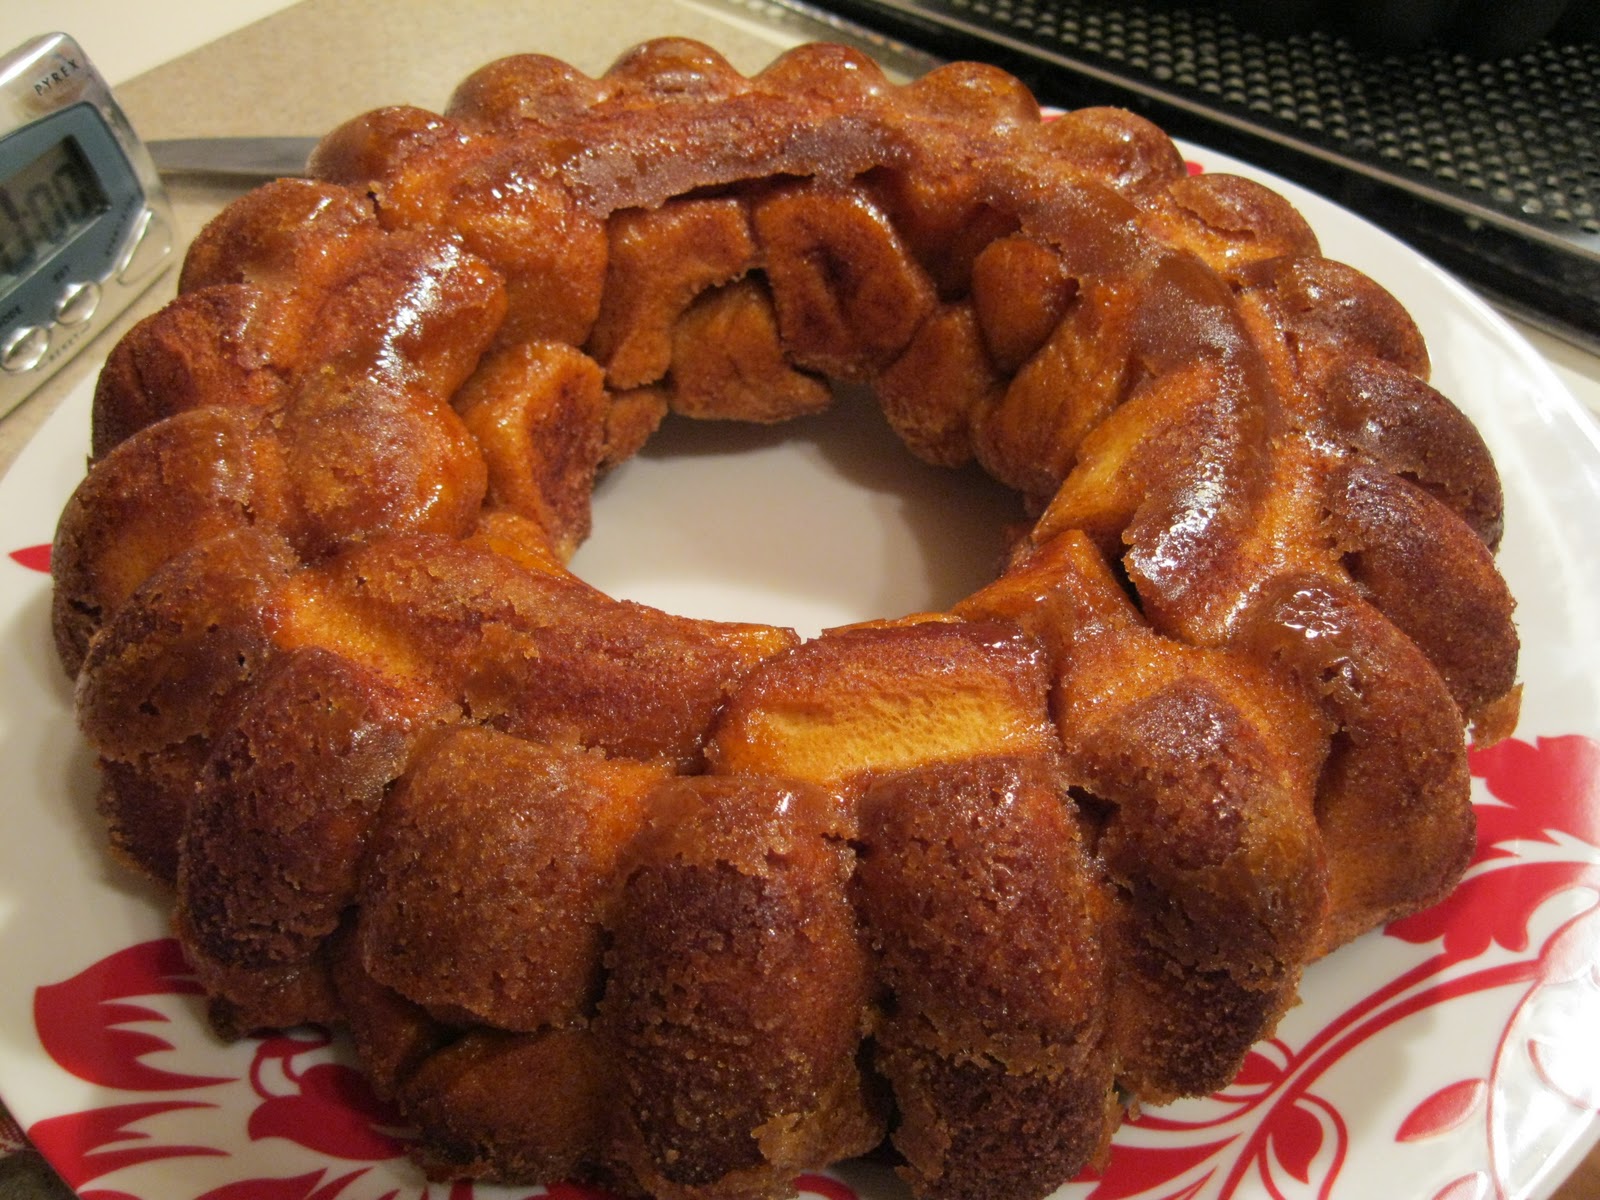
It was a great coincidence that the day after I was chatting with some friends about making monkey bread, I noticed my friend's post for monkey bread on her blog. I halved her recipe but should have cut the baking time a little more as well because mine got a little crispy around the edges (I can't remember exactly how long I had it in, but I would check it around 30 min). (Of course, don't butter your Flexipan!) It was still yummy, although I must say, it was missing something from the monkey bread my mom used to make (maybe all the under-done sticky goo). ;)
background
Friday, February 25, 2011
Wednesday, February 23, 2011
Fun Cupcakes!
Contributed by Brenna Hansen
Mix up your basic white cake mix. Fill Muffin tray (or decorative tray of your choice) 1/3 full with white cake batter. Color remaining batter a light pink and put half into a pastry bag (or ziplock bag). Color the remainder of the batter super dark pink, then put that batter into another pastry bag (or ziplock). Cut off tip of ziplock bags, if using. Insert tip of first bag down into the middle of the white batter and squeeze about a quarter size in the middle. Repeat with the darker color to fill the tray 2/3 to 3/4 full. LOVE these! You can do it with any colors for any holiday! I also like to add a flavor to the colored mix when I have it on hand... raspberry oil, chocolate, etc. Mix it up!
Thanks Brenna!!
Wednesday, February 16, 2011
Pizza! Pizza!
Contributed by Brenna Hansen
My sister-in-law made Weight Watchers pizza on her Silpat. She enjoyed the pizza one day, and enjoyed washing the Silpat the next. She said that even after the baked on cheese had sat overnight, it still came right off!
As a side note - I've also made pizza on my Silpat. I used the Demarle herbed pizza dough and it was MMmmm good!! So good I bought lots more to use next time...and the next..! Typically when I make homemade pizza I have to bake the crust first for 15-20 minutes so it's not gooey in the middle once I put the toppings on. With the Silpat and Perforated Baking Sheet, I put my toppings on unbaked dough, and after it had baked the crust was fabulous! Completely baked all the way through with a nice browned bottom. Yummy!
Back to Brenna... she even made us a video!! Thanks Brenna!!
Tuesday, February 15, 2011
For the Crafty
Silpats are great in the kitchen, but think of what their non-stick goodness can do elsewhere! Hot glue, super glue, whatever glue you use, won't stick to the Silpat so it's great to use when working on projects. How many times have you glued something and laid it on some newspaper only to have newspaper stuck to your project for life? Maybe I'm the only one...??
Get creative with your Silpat!
Friday, February 11, 2011
Candy Caramels
Contributed by Amy Harris.
My friend Martha, I mean, Amy, decided to make caramels for Valentine's Day. Here's what she says:
"Usually, after they bubble away in the pot on the stove, I pour them into a super-buttered-up square glass pan to cool before cutting them into squares and wrapping them. Since I cook them to 225 degrees, I figured they would be fine in my Demarle mold. I used the large round mold. After they cooled overnight, I simply peeled back the sides, and voila!, they came out with no sticking! I usually have to spend 10-15 minutes with a metal spatula prying the candy out of the dish (with many bent and ruined metal spatulas!) . Not this time! The mold worked great! It was worth having just for this purpose. Thanks so much for introducing me to this great product."
Thanks Amy!!
My friend Martha, I mean, Amy, decided to make caramels for Valentine's Day. Here's what she says:
"Usually, after they bubble away in the pot on the stove, I pour them into a super-buttered-up square glass pan to cool before cutting them into squares and wrapping them. Since I cook them to 225 degrees, I figured they would be fine in my Demarle mold. I used the large round mold. After they cooled overnight, I simply peeled back the sides, and voila!, they came out with no sticking! I usually have to spend 10-15 minutes with a metal spatula prying the candy out of the dish (with many bent and ruined metal spatulas!) . Not this time! The mold worked great! It was worth having just for this purpose. Thanks so much for introducing me to this great product."
Thanks Amy!!
Thursday, February 10, 2011
Country Chicken Pot Pie
My husband said "This is the best chicken pot pie I've ever tasted. All the others are grody." (I asked him how to spell grody and he said "like brody with a g?"). We had a good laugh. Chicken pot pie is not something I have ever made in the past....cause I always thought they were "grody", but this was very easy to make and is actually pretty good. The recipe for this one is found on page 87 of the "Cooking Across America" cookbook. I've made this in the flower mold, but this time I made it in the large round mold. You can have chicken pot pie in any shape you'd like!
Wednesday, February 9, 2011
Chocolate Fudge Jr. Mint cupcakes
Contributed by Meredith Slight. Thanks Meredith!!
Don't these look fabulous! Meredith says she got 40 mini cupcakes out of this recipe and only put 1 Jr. Mint in the center of the batter.
Meredith co-hosted a show in January with my friend Amy Harris. They hold the record for best attended show - they had 22 guests!! I've never heard of that before! We were all so excited about the amount of freebies they were able to get! One of which was the mini muffin tray, which Meredith has put to good use. Here's her recipe:
Chocolate Fudge Jr Mint Centered Cupcakes
1 box Pillsbury Devils Food Cake Mix
4 eggs
1/2 Cup vegetable oil
1/2 Cup water
1 small box instant chocolate pudding mix
1/2 Cup sour cream
1 Cup chocolate chips
3 4 oz boxes Jr Mints (look for them on sale, I found them for $1.00)
Favorite Vanilla or Cream Cheese Frosting
1. Preheat oven to 350 degrees F. In a stand or electric mixer, add the cake mix, eggs, oil, water, pudding mix, sour cream and chocolate chips. Mix on medium for 2 minutes or until well combined and somewhat thick. Scoop into 24 paper lined muffin cups. Press 3 JR mints into the center of each cupcake center. Bake for 22-25 minutes or until toothpick comes mostly clean from center. Let cool completely and frost with your favorite vanilla or cream cheese frosting.
24 cupcakes
Subscribe to:
Posts (Atom)


